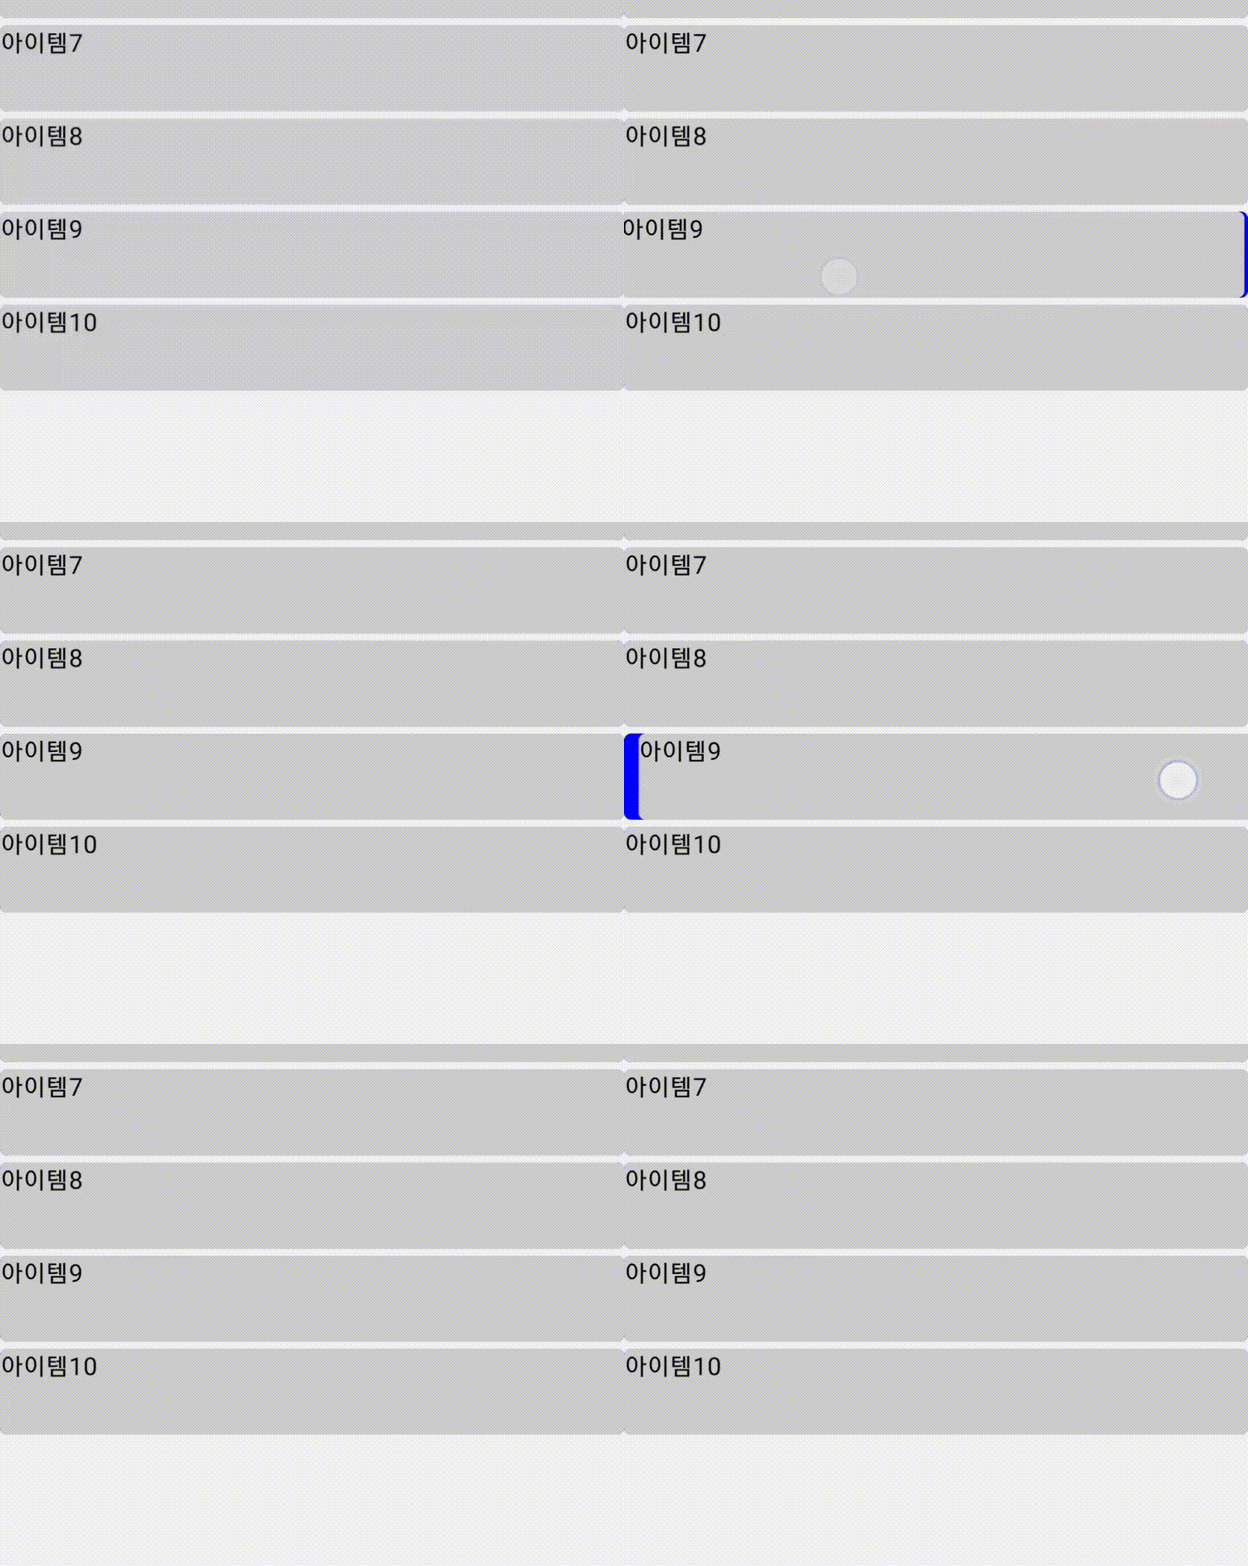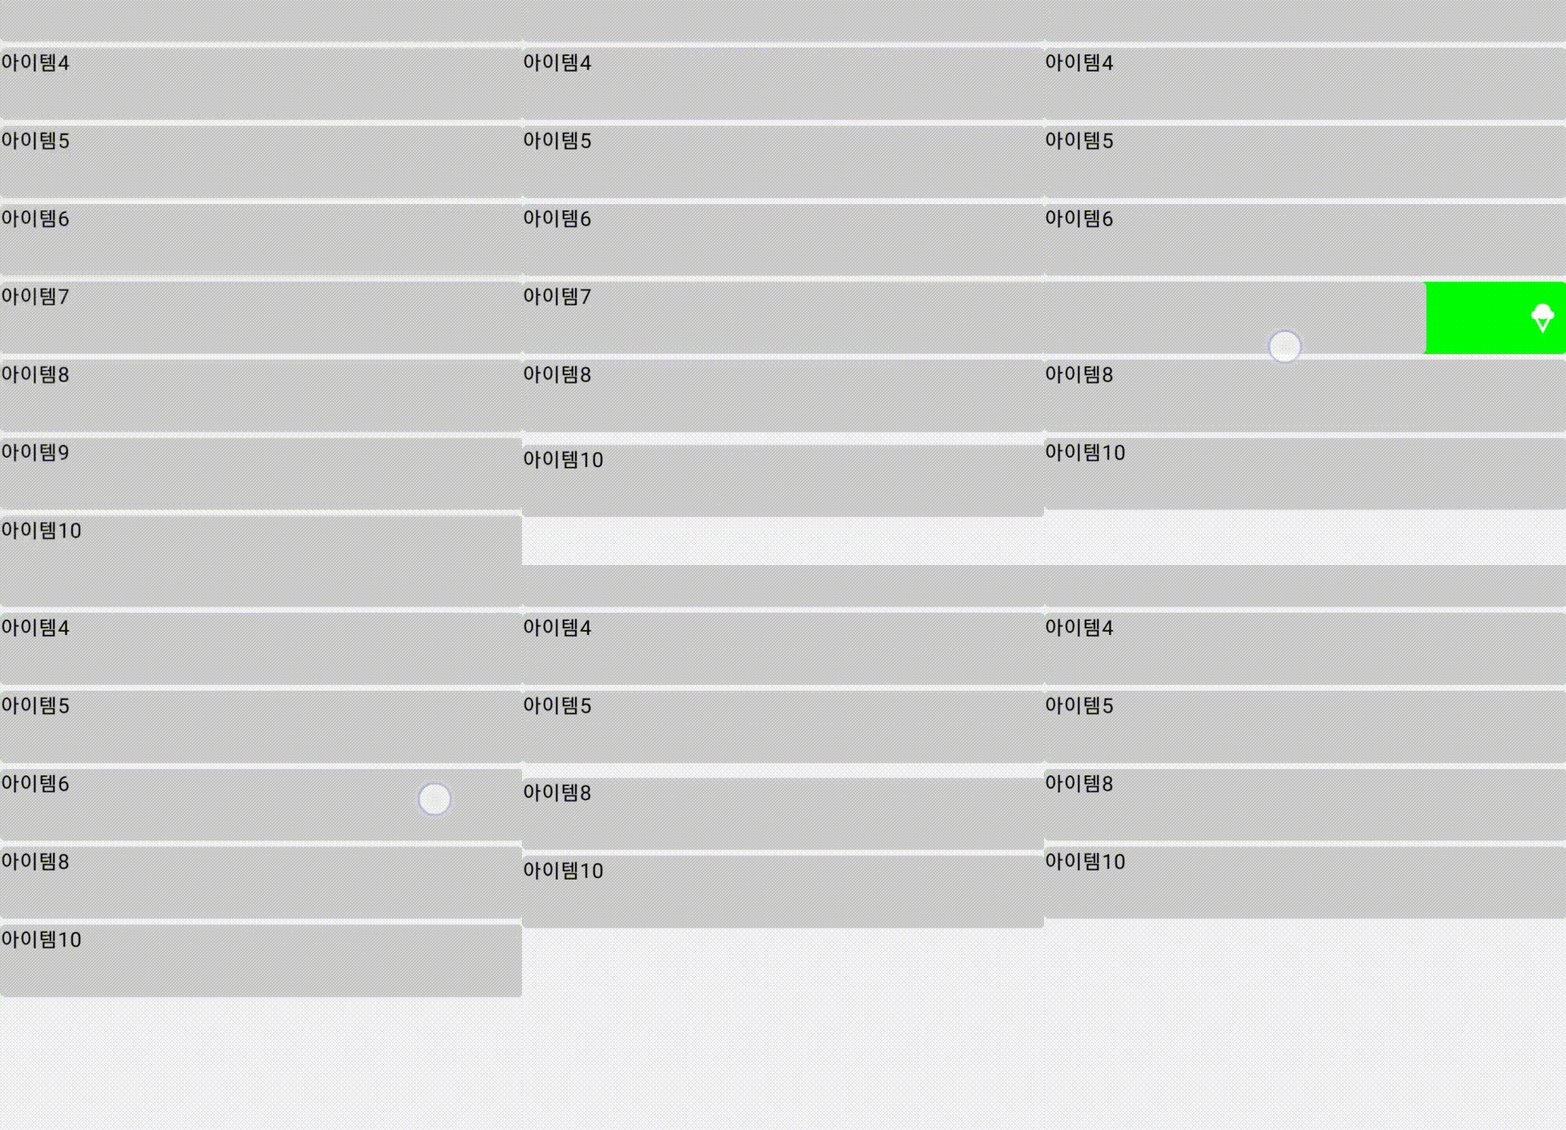
오늘은 위와 같이 Jetpack Compose로 Swipe하여 삭제(dismiss)하는 Composable를 만들어보려고합니다.
Jetpack Compose는 기본적으로 SwipeToDismiss Composable를 제공하고 있습니다.
하지만 Material3 Stable Release 버전에서는 지원하지 않고 있습니다. ( Material2는 지원함 )

하지만 알파버전인 1.1.0-alpha04 버전에서는 지원하니, 이 버전을 통해 구현해도 좋을 것 같습니다.
알파버전을 사용하지 않는다면
AndroidX Tech: Source Code for Swipeable.kt
Copyright © 2023 CommonsWare, LLC — All Rights Reserved
androidx.tech
AndroidX Tech: Source Code for SwipeToDismiss.kt
Copyright © 2023 CommonsWare, LLC — All Rights Reserved
androidx.tech
위의 두개의 소스 코드를 다운받아서 구현하면됩니다.
이제 SwipeToDismiss의 컴포저블이 어떻게 구현되어 있는지 확인해보겠습니다.
```kotlin
@Composable
@ExperimentalMaterial3Api
internal fun SwipeToDismiss(
    state: DismissState,
    modifier: Modifier = Modifier,
    directions: Set<DismissDirection> = setOf(
        EndToStart,
        StartToEnd
    ),
    dismissThresholds: (DismissDirection) -> ThresholdConfig = {
        FixedThreshold(DISMISS_THRESHOLD) // Dp
    },
    background: @Composable RowScope.() -> Unit,
    dismissContent: @Composable RowScope.() -> Unit
) = BoxWithConstraints(modifier) {
}
```첫번째로 DismissState가 보입니다. SwipeToDismiss 컴포저블의 상태라고 할 수 있습니다.
이 상태는 rememberDismissState를 통해서 DismissState를 생성할 수 있습니다.
SwipeToDismiss에 넣어줄 상태를 정의해보겠습니다.
val dismissState = rememberDismissState(confirmStateChange = { dismissValue ->
		when(dismissValue){
			DismissValue.Default->{
				false or true
			}
			DismissValue.DismissedToStart->{
				false or true
			}
			DismissValue.DismissedToEnd->{
				// 리스트 삭제 람다
				remove(item)
				false or true
			}
		}
}rememberDismissState Composable함수를 통해서 우리는 현재 DismissValue의 방향에 따라 행동을 정의해줄 수 있습니다.
특정 방향으로만 Dismiss가 가능하게 해주고 싶다면 위의 요소에서 원하는 방향만 True로 변경해주면 됩니다.
또한 True와 함께 실제 데이터를 제거하는 로직이 들어가야합니다.
SwipeToDismiss의 변수 중에 directions는 Dismiss할 수 있는 방향을 정하는 부분입니다.
기본이 EndToStart와 StartToEnd로 되어있는데 이 부분을 EndToStart만 넣어주게 된다면

위와 같이 Start -> End로의 Swipe 동작이 제한됩니다.
directions와 confirmStateChange의 적절한 조합을 통해서, Swipe동작은 되는데 Dismiss를 하지 않게 할 수도 있기 때문에 원하시는 동작에 맞춰서 구현하시면 좋을 것 같습니다.
이제 SwipeToDismiss의 내부를 보겠습니다.
// SwipeToDismiss내부
= BoxWithConstraints(modifier) {
    Box(
        Modifier.swipeable(
            state = state,
            anchors = anchors,
            thresholds = thresholds,
            orientation = Orientation.Horizontal,
            enabled = state.currentValue == Default,
            reverseDirection = isRtl,
            resistance = ResistanceConfig(
                basis = width,
                factorAtMin = minFactor,
                factorAtMax = maxFactor
            )
        )
    ) {
        Row(
            content = background,
            modifier = Modifier
        )
        Row(
            content = dismissContent,
            modifier = Modifier.offset { IntOffset(state.offset.value.roundToInt(), 0) }
        )
    }
}SwipeToDismiss는 background Composable과 dismissContent Composable를 인자로 받고 Box layout안에서 두개를 겹쳐서 보여주는 방식으로 구현되어있습니다.
SwipeToDismiss의 background에 아무런 Composable을 넘겨주지 않는 다면 뒷배경이 없도록 구현해줄 수 있습니다.

background 에 저는 아이스크림 아이콘이 보이는 컴포저블을 넘겨주었습니다.
background와 dismissContent가 완벽하게 겹치도록 동일한 modifier를 적용해주면 좋습니다.
이렇게 만들고 나니 일정 범위를 Swipe 할 때 색상이 변경되도록 해주고 싶습니다.
위에서 정의한 dismissState를 이용하여 dismissState의 targetValue를 통해서 color의 애니메이션을 적용해줄 수 있습니다.
val color by animateColorAsState(
	targetValue = if (dismissState.targetValue == DismissValue.DismissedToStart)
    Color.Red else Color.Green
)dismissThresholds를 넘어서게 된다면 dismissState.targetValue가 현재 스와이프 방향으로 변경되기 때문에 임계값이 넘어갔을 때 Red 아닐때 Green으로 설정해주었습니다.

dismissThresholds: (DismissDirection) -> ThresholdConfig = {
        FixedThreshold(DISMISS_THRESHOLD)// 고정값 dp
		or
		FractionalThreshold(.5f) // 비율로 임계값 설정

}현재는 FixedThreshold로 00.dp로 고정으로 임계값을 설정하였는데, 비율로 임계값을 설정하기 위해서는 FractionalThreshold를 사용하면 됩니다.
Tip!


두개의 차이점을 보면 dismiss가 될 경우 삭제될 때 animate이 왼쪽에는 존재하는데 오른쪽에는 존재하지 않습니다.
SwipeToDismiss(
  modifier = Modifier.animateItemPlacement(),
	~
)animateItemPlacement를 modifier에 적용해준다면, 아이템이 재정렬이나 삭제, 추가 될때 애니메이션이 적용됩니다.
다만 Lazy List안에서만 적용되니까 LazyColum을 사용한다면 사용해봅시다.
전체코드
@OptIn(ExperimentalMaterial3Api::class, ExperimentalFoundationApi::class)
@Composable
fun Test(
    modifier: Modifier = Modifier
) {
    val observeList = remember {
        mutableStateListOf(
            "아이템1", "아이템2", "아이템3", "아이템4", "아이템5", "아이템6", "아이템7", "아이템8", "아이템9", "아이템10"
        )
    }
    LazyColumn(
        modifier = modifier,
        verticalArrangement = Arrangement.spacedBy(4.dp)
    ) {
        items(observeList, key = { it }) { item ->

            val dismissState = rememberDismissState(
                confirmStateChange = { dismissValue ->
                    when (dismissValue) {
                        DismissValue.Default -> {
                            false
                        }
                        DismissValue.DismissedToStart -> {
                            observeList.remove(item)
                            true
                        }
                        DismissValue.DismissedToEnd -> {
                            false
                        }
                    }
                }
            )

            val color by animateColorAsState(
                targetValue = if (
                dismissState.targetValue == DismissValue.DismissedToStart
                ) Color.Red
                else Color.Green
            )
            SwipeToDismiss(
                modifier = Modifier.animateItemPlacement(),
                state = dismissState,
                directions = setOf(DismissDirection.EndToStart),
                background = {
                    Row(
                        modifier = Modifier.fillMaxWidth()
                        .height(50.dp).background(
                        color = color, shape = RoundedCornerShape(4.dp)
                        ),
                        horizontalArrangement = Arrangement.End,
                        verticalAlignment = Alignment.CenterVertically
                    ) {
                        Icon(
                            modifier = Modifier.padding(end = 5.dp),
                            imageVector = Icons.Default.Icecream,
                            tint = Color.White,
                            contentDescription = null
                        )
                    }
                }
            ) {
                Row(
                    modifier = Modifier
                ) {
                    Text(
                        item,
                        modifier = Modifier.fillMaxWidth().
                        height(50.dp).background(
                            color = LightGray,
                            shape = RoundedCornerShape(4.dp)
                        )
                    )
                    Spacer(modifier = Modifier.fillMaxWidth().height(1.dp))
                }
            }
        }
    }
}마무리
오늘은 간단히 SwipeToDismiss Composable를 만들어보았습니다. Dismiss를 하지 않고도 옆으로 Swipe에서 다른 동작을 하거나, 다양한 곳에 적용이 될 수 있을 것이라고 생각이 됩니다.
출처
https://developer.android.com/jetpack/androidx/releases/compose-material3#1.1.0-alpha05
'Compose' 카테고리의 다른 글
| Compose와 함께 Motion Layout을 사용하여 애니메이션 구현하기 (0) | 2023.05.24 |
|---|---|
| rememberUpdatedState (0) | 2023.02.15 |
| Jetpack Compose GapBuffer (1) | 2022.10.27 |
| Jetpack Compose의 최적화 (0) | 2022.10.13 |
| Blur in Jetpack Compose (0) | 2022.07.20 |
